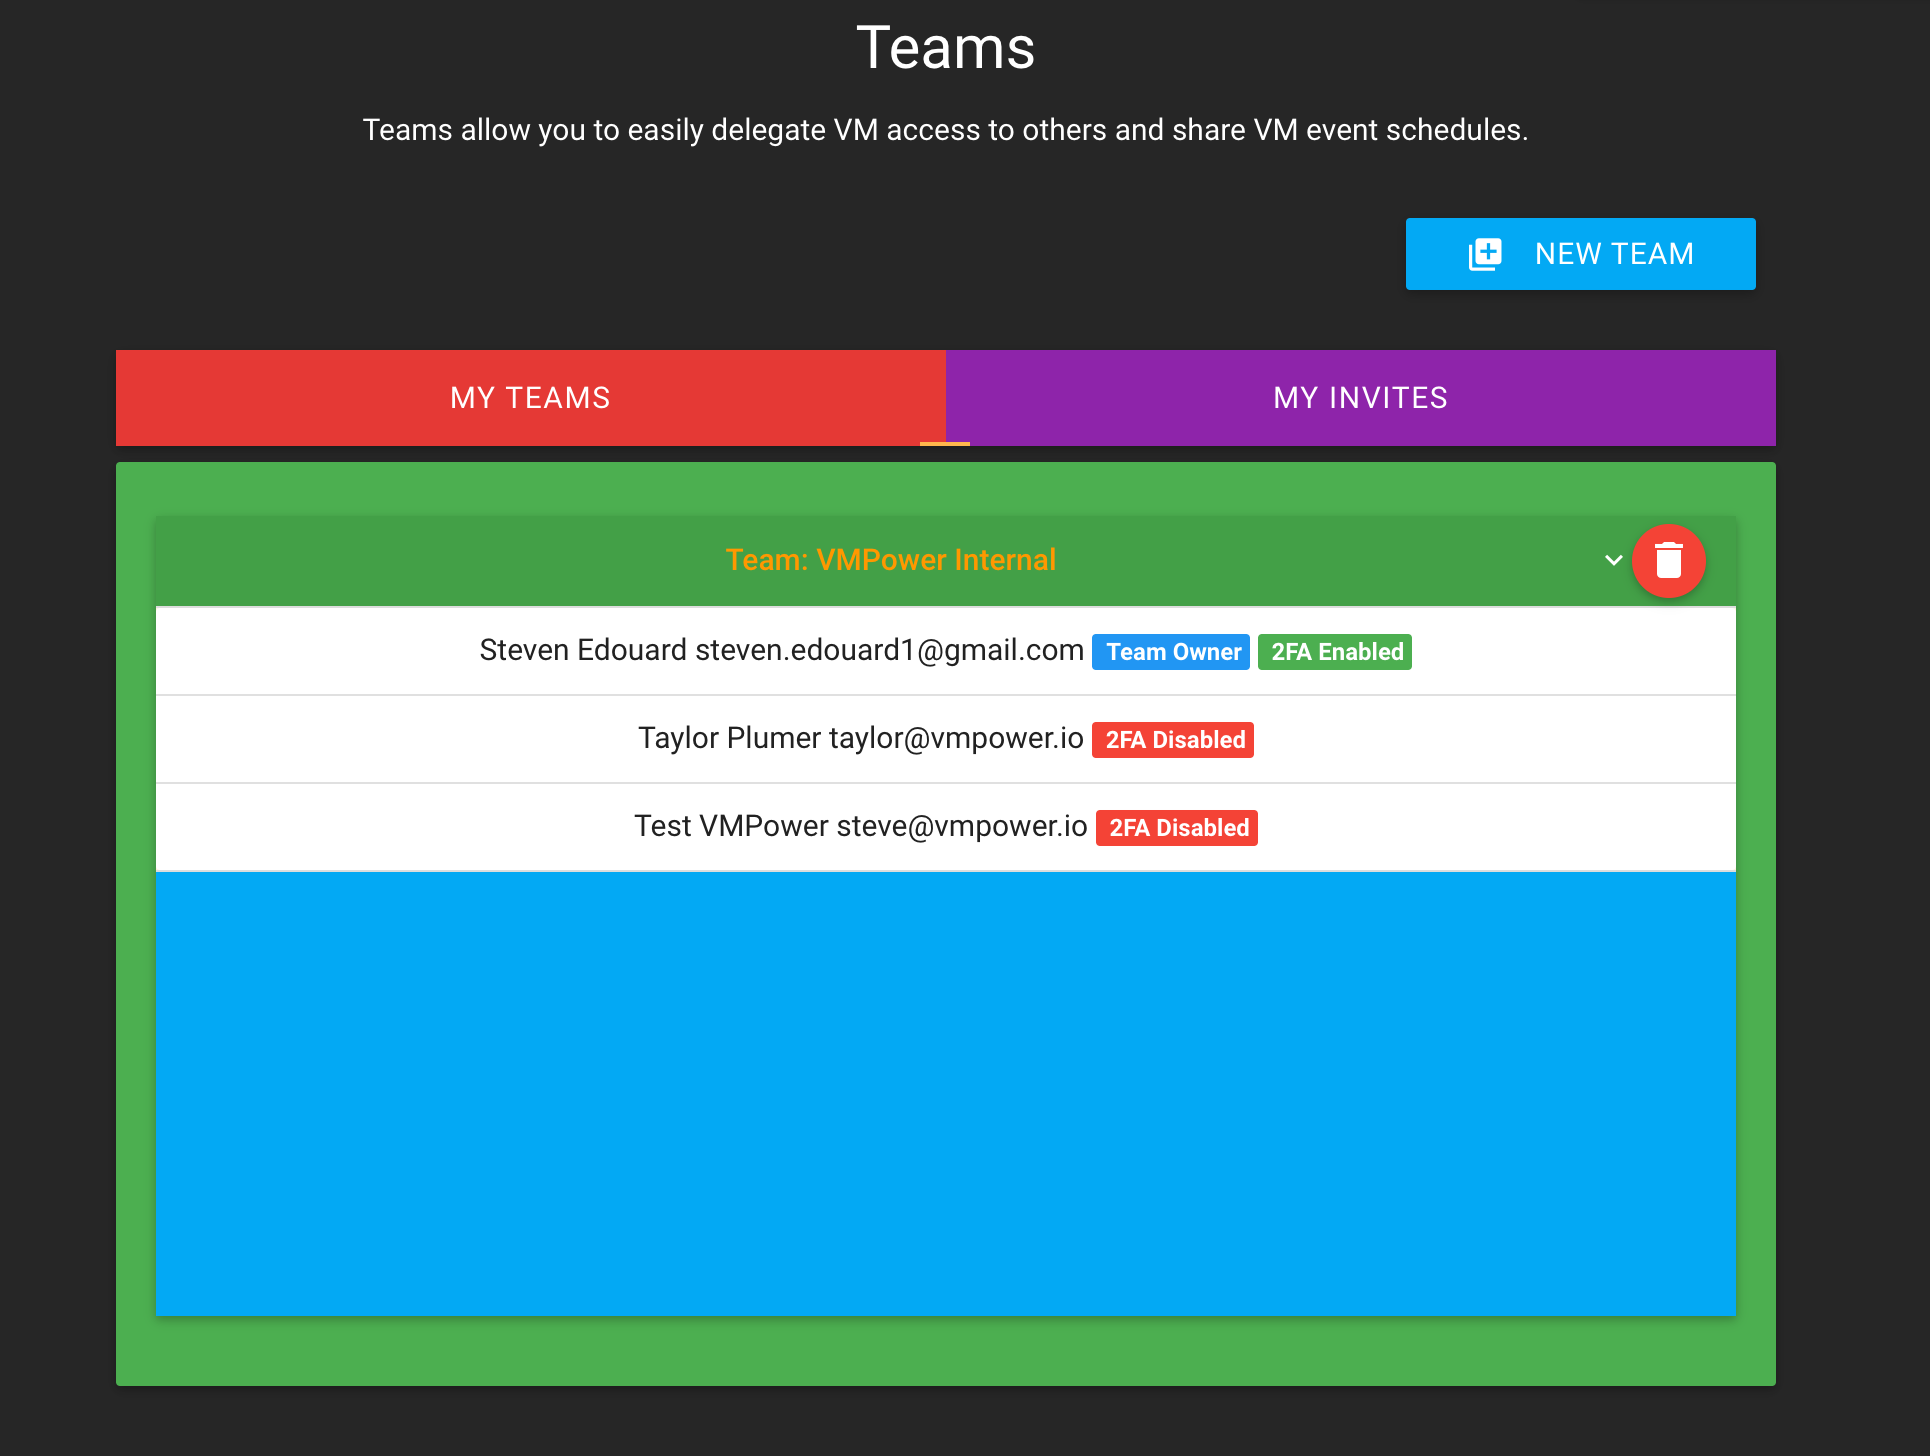
Teams
Teams provide an easy way for you to share VMs and associated automation schedules with others on your team. VMs access is delegated through VM Groups. You can have multiple VM Groups shared with a single team.
Creating a Team
Go to the Teams section. Click the 'New Team' button:
Create a name for the new VMPower Team and you'll be presented with the Team settings page:
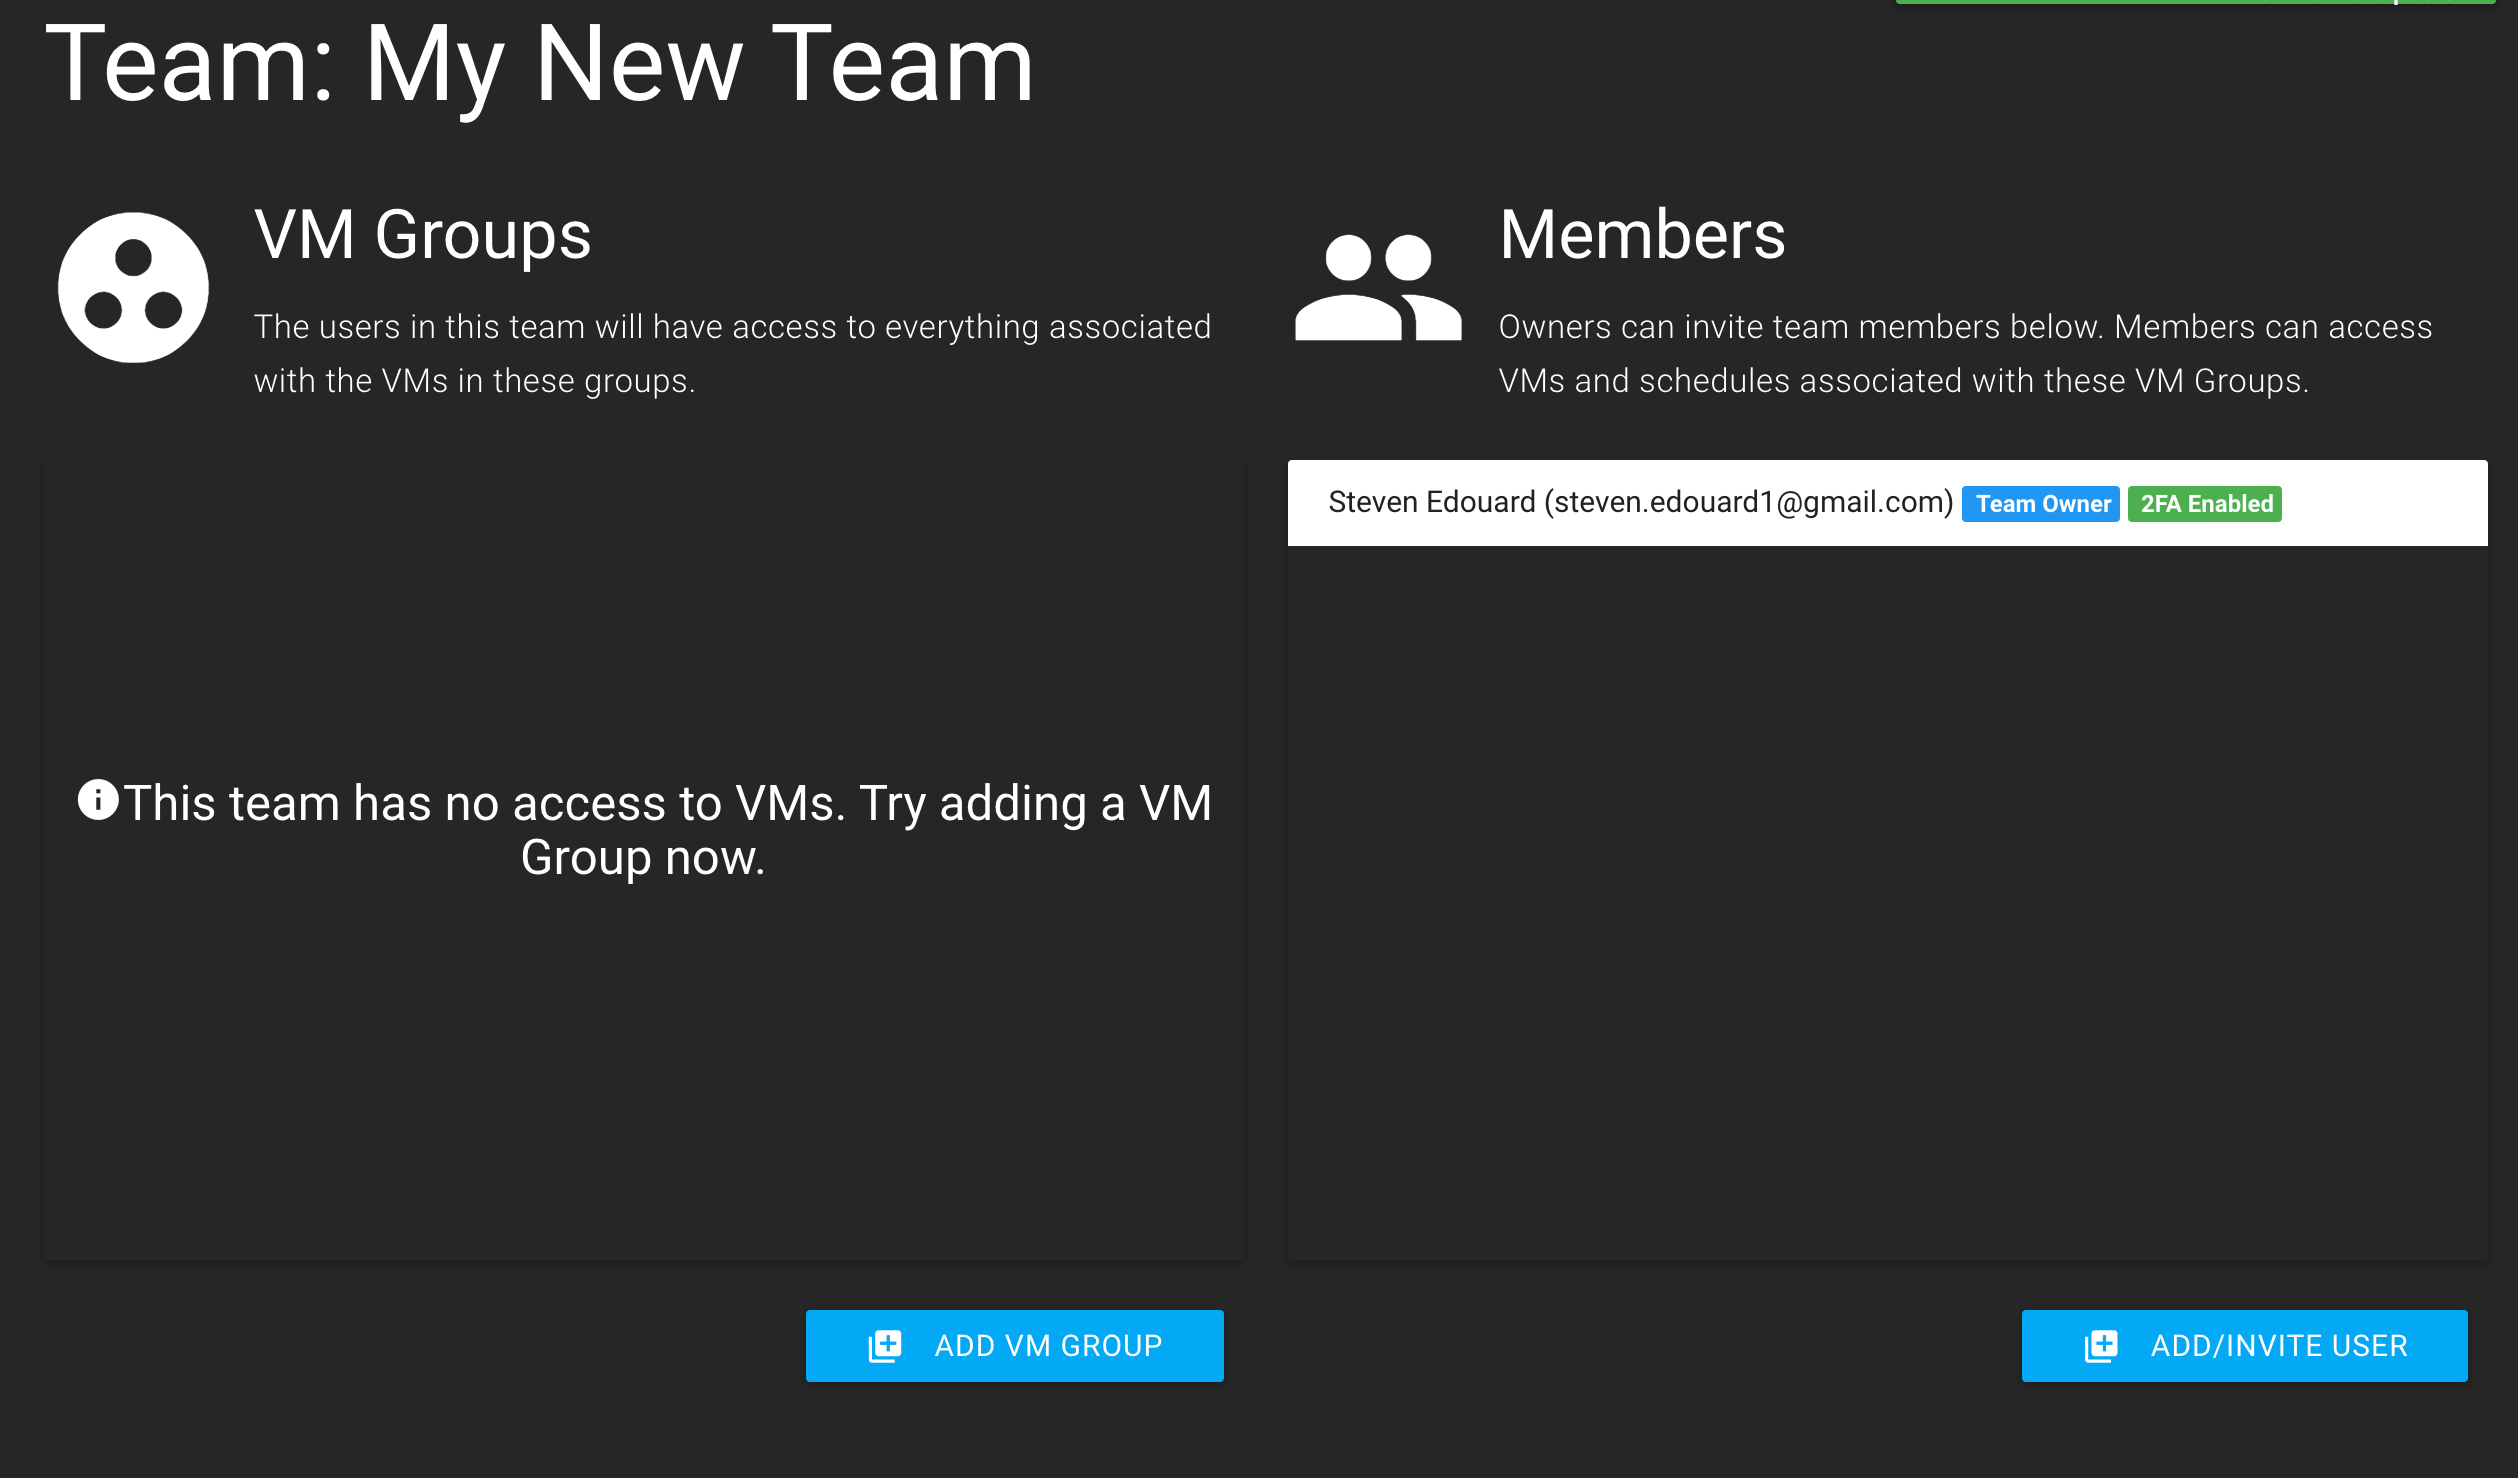
On the left you can associate VM Groups to this team. On the right you can associate users to the team. Any user you add will have access to power on, off, resize and manage backup of the VMs.
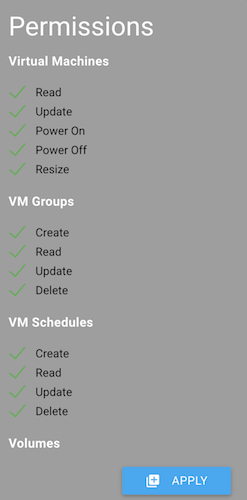
Permissions
Custom Permissions
You can assign permissions to the Team by applying any combination of permissions to the group. For example, applying all of the permissions effectively create a co-administrator:
It is also possible to create restricted groups that for example can power on VMs but cannot power them off or read VM schedules but not be able to modify them.
With custom permissions you can apply a custom permission policy to a subgroup of members in your organization.
Permissions by VM Group
Applying permissions by VM Group allows you to specify vm-level access to a subset of virtual machines (and related resources) associated to a VM Group. This is useful if you want to restrict the dashboard view to users to only a subset of the total virtual machines managed by your account.
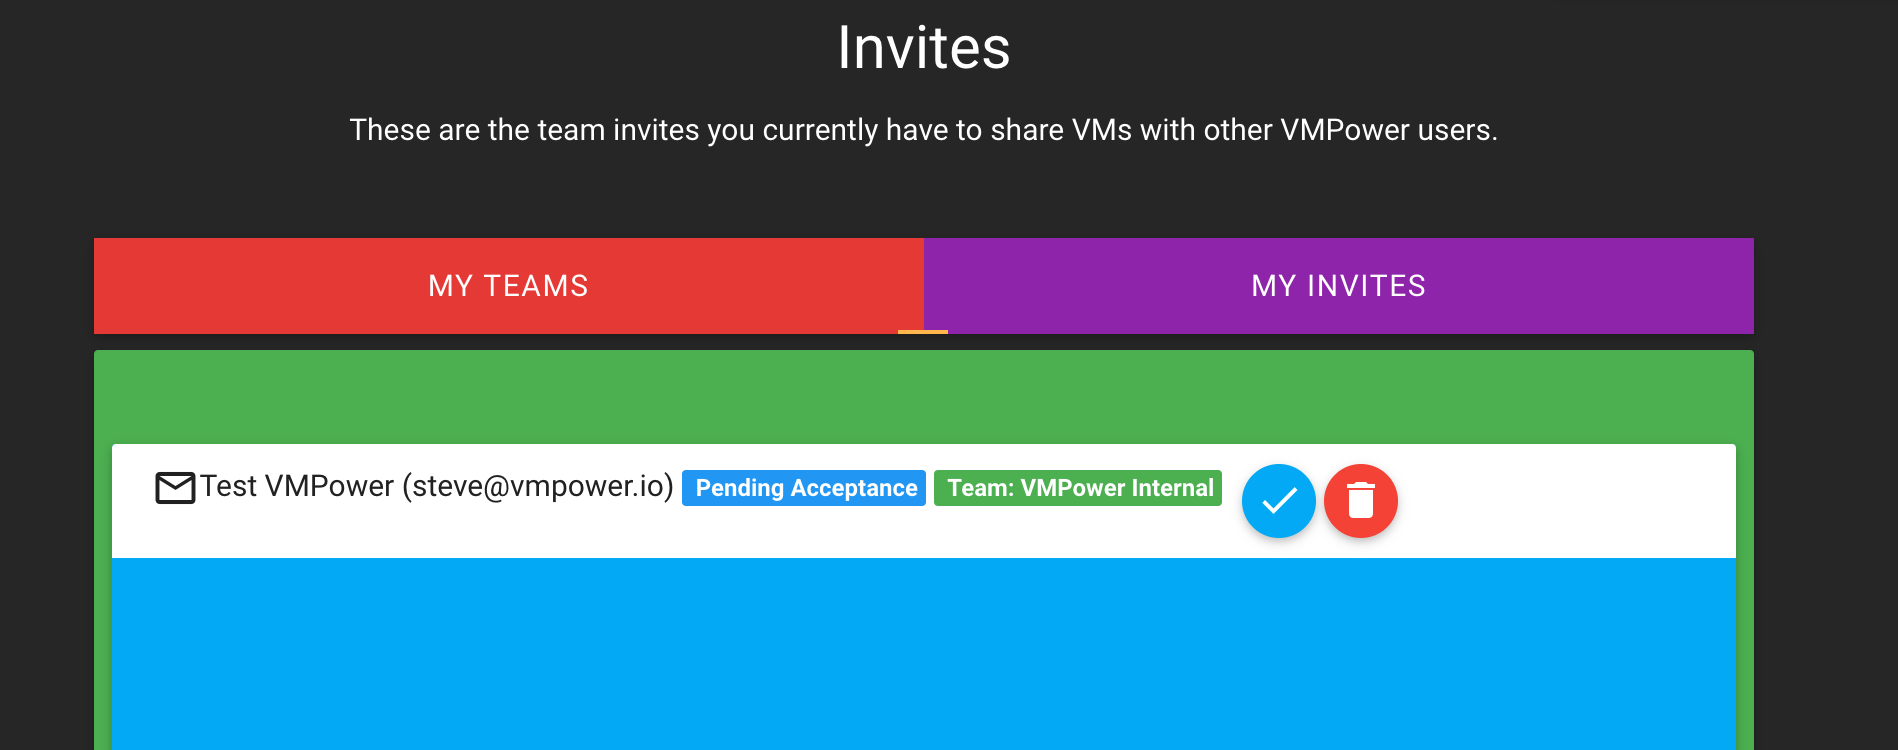
Joining a Team
You will receive two emails. One informing you that you have been invited to join a VMPower team. If you don't currently have a VMPower account registered, you will get another email informing you of your temporary password and a link to confirm your email.
Go to the Team Invites section and accept your invite:
Now you'll be able to see the VMs shared with you, schedules and be able to modify the VMs as you need.